

cPanel is one of the most popular control panels for managing web hosting accounts. One of its essential features is the ability to add new domains to your hosting account. This is useful when you want to host multiple websites under a single cPanel account. In this guide, we will walk you through the step-by-step process of adding a domain to cPanel.
Table of Contents
Why Add a Domain in cPanel?
Adding a new domain allows you to host multiple websites under one hosting account, saving you the cost of purchasing additional hosting plans. It also enables easier management of multiple sites through one cPanel login.
Prerequisites:
- Access to cPanel login credentials.
- A registered domain name.
- A hosting account with enough resources to host additional domains.
Step-by-Step Guide to Adding a Domain in cPanel
Step 1: Log in to Your cPanel Account

First, access your cPanel account using the URL provided by your hosting provider. The typical cPanel login URL is https://yourdomain.com/cpanel. Enter your username and password to log in.
Step 2: Navigate to the “Domains” Section
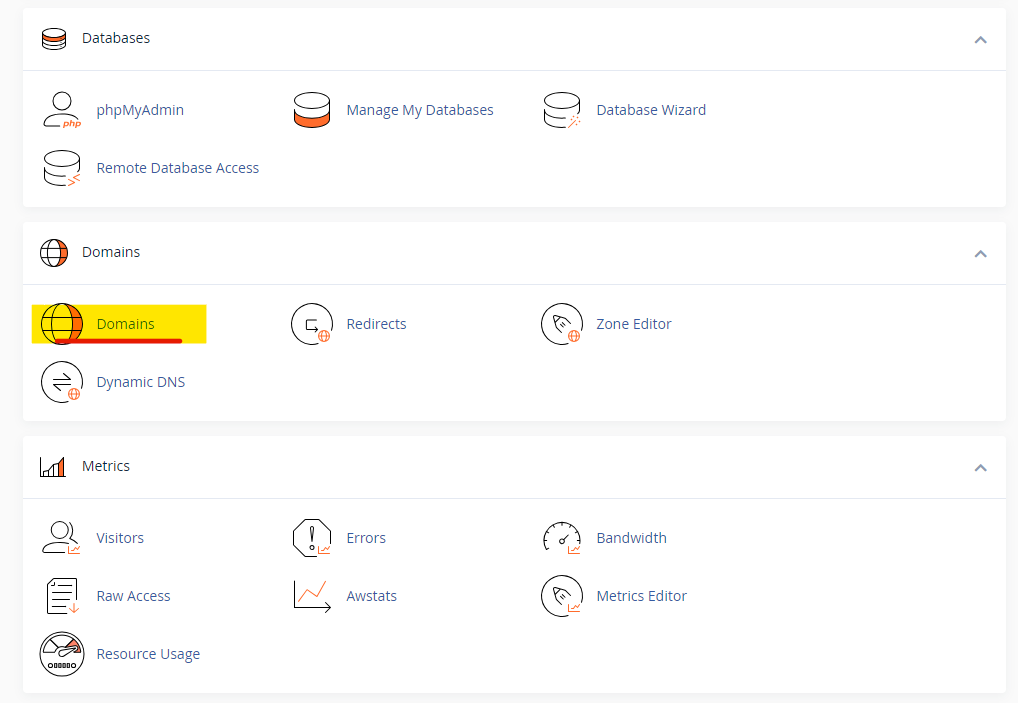
Once logged in, scroll down to the “Domains” section. There you will find various options such as:
- Addon Domains: This is for adding new domain names that will point to a different website.
- Aliases (also called Parked Domains): Used when you want a new domain to point to an existing website.
- Subdomains: Create a domain that is part of a larger domain (e.g., blog.yourdomain.com).
For this guide, we will focus on adding a new Addon Domain.
Step 3: Add an Addon Domain
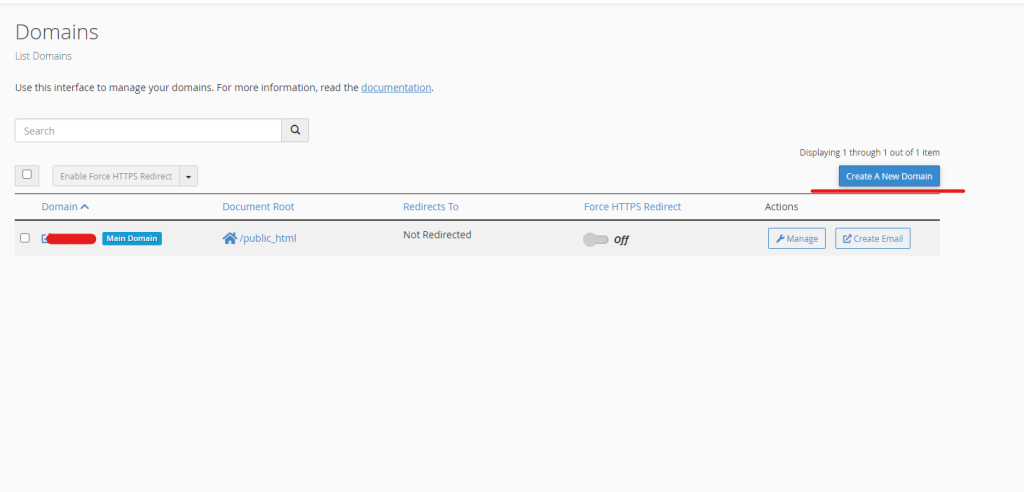
- Click on Addon Domains.
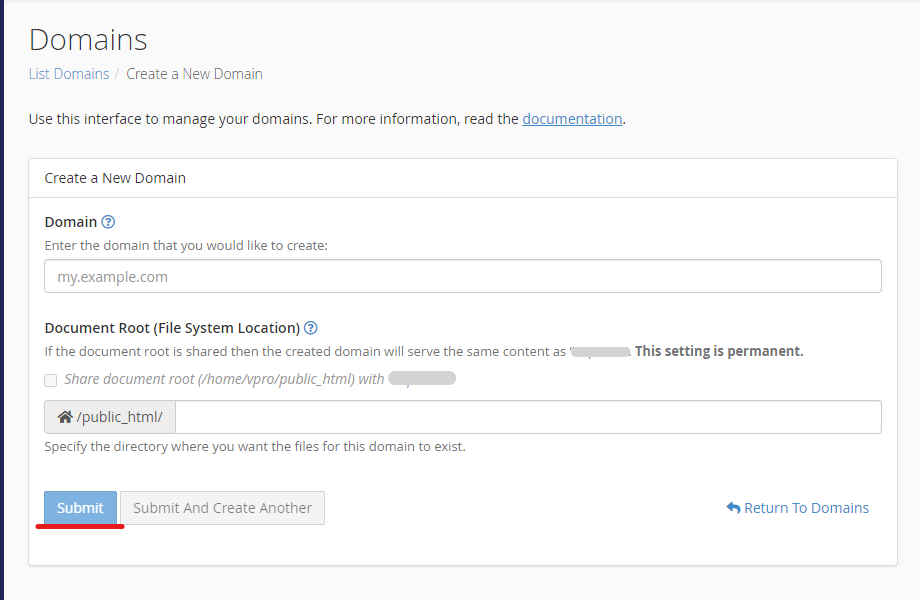
- Enter the new domain name you want to add in the “New Domain Name” field. For example, if your new domain is
newsite.com, type that in. - The “Subdomain” and “Document Root” fields will automatically fill out. The subdomain is created for internal use by cPanel to manage the new domain, while the document root specifies where files for the new domain will be stored. If you want, you can customize the document root directory, but it’s usually fine to leave the default settings.
- If you want to create an FTP account for this new domain, check the “Create an FTP account associated with this Addon Domain” box.
- Click Add Domain to complete the process.
Step 4: Point Your Domain to the Hosting Server
Once you’ve added the domain, you need to point your domain’s DNS to your hosting provider. Log in to your domain registrar (the service where you bought the domain), and update the DNS (Domain Name Servers) to the nameservers provided by your hosting provider.
For example:
- ns1.yourhost.com
- ns2.yourhost.com
DNS propagation usually takes 24-48 hours, but in some cases, it might be quicker.
Step 5: Upload Website Files
After adding the domain and updating the DNS, you need to upload your website’s files to the new domain’s document root. This can be done through:
- File Manager in cPanel: Go to the File Manager option under the “Files” section and navigate to the directory associated with your new domain.
- FTP: Use an FTP client like FileZilla to upload the files to the appropriate directory.
Make sure you upload your website files to the document root of your new domain (e.g., /public_html/newsite.com/).
Step 6: Install SSL (Optional but Recommended)
After adding the domain and uploading your site, it’s a good practice to secure it with SSL. To enable free SSL for your domain:
- Go to the SSL/TLS Status section in cPanel.
- Select the new domain and click Run AutoSSL. cPanel will install a free SSL certificate for your domain, ensuring it’s accessible via HTTPS.
How to Add a Parked Domain (Alias)
If you want a domain to point to an existing site instead of creating a new one, you can add it as a Parked Domain (Alias). Here’s how:
- Go to the Aliases section under “Domains.”
- Enter the domain you want to park (e.g.,
parkedsite.com). - Click Add Domain.
This will make parkedsite.com point to your main site (e.g., mainsite.com).
Managing Multiple Domains in cPanel
Once you’ve added the domain, you can manage it under the Addon Domains section. Here you can:
- Remove the domain if you no longer need it.
- Change the document root if you want to relocate where the website files are stored.
- Manage redirections if you want the new domain to point to a different URL.
Common Issues When Adding a Domain
- Domain already exists: This error occurs if the domain is already added to the server, either as a main domain, parked domain, or subdomain.
- DNS not updated: If your DNS settings aren’t updated correctly, your domain might not resolve to your website.
- Document root confusion: Make sure you upload your website files to the correct document root for the new domain.
Conclusion
Adding a domain in cPanel is a straightforward process that allows you to host multiple websites under a single hosting account. By following the steps outlined in this guide, you can easily add an addon domain, update its DNS settings, and upload your website files. Whether you’re managing a personal project or expanding a business, cPanel makes it easy to handle multiple domains from one interface.
By efficiently using cPanel’s domain management tools, you can save costs and streamline the process of hosting multiple websites.