
Creating a new account in cPanel is a simple and essential task for website management, whether you’re setting up a new domain, hosting, or email service. In this guide, we’ll walk you through the entire process, from logging in to cPanel to creating an account for a new user. By the end, you’ll have a fully functional cPanel account that can be used for managing websites, emails, databases, and more.
Table of Contents
Why Create a New Account in cPanel?
Before diving into the steps, it’s essential to understand why you might need to create a new cPanel account. Some of the common reasons include:
- Hosting multiple websites: If you manage multiple domains, each may require its own cPanel account for better organization and management.
- Client management: Web hosting resellers and agencies may need to create separate cPanel accounts for different clients.
- Security and isolation: Having separate cPanel accounts ensures that each website operates independently, reducing the risk of one site affecting others.
Prerequisites
Before creating a new account in cPanel, ensure you have the following:
- Access to WebHost Manager (WHM) as a root or reseller user.
- The domain name you want to associate with the new account.
- Knowledge of the resources (e.g., disk space, bandwidth) you want to allocate to the new account.
Step-by-Step Guide to Creating a New Account in cPanel
Step 1: Log in to WHM
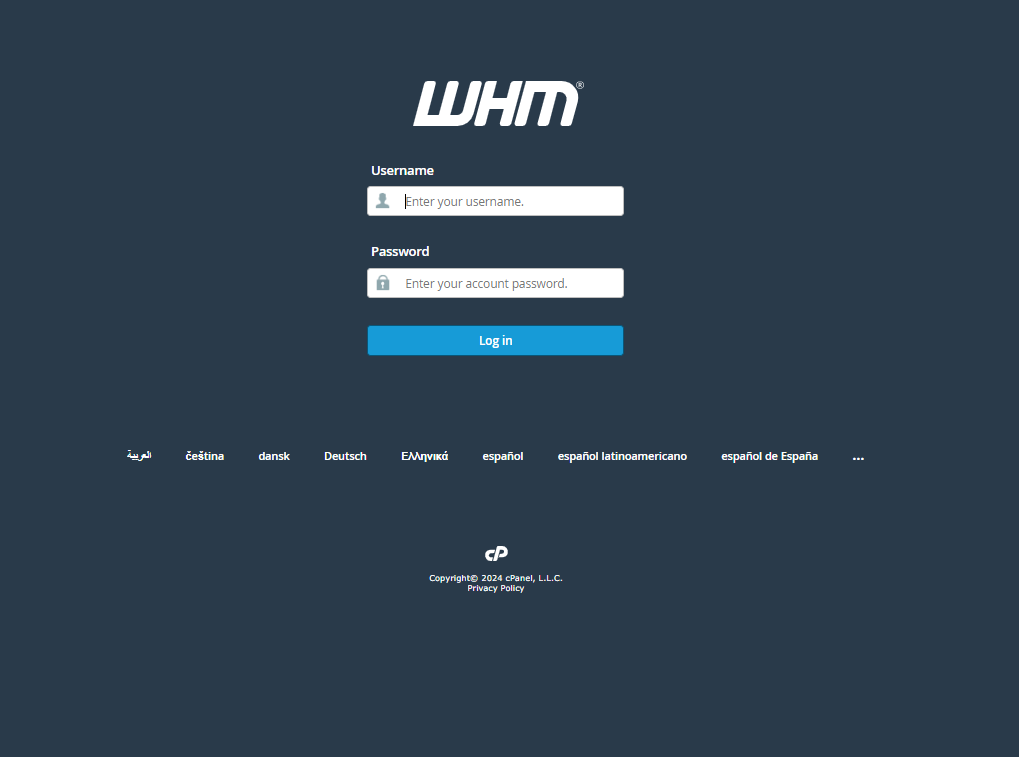
To create a new account in cPanel, you need to log in to WHM (WebHost Manager), which is the administrative interface used to manage multiple cPanel accounts.
- Open your browser and navigate to your WHM login URL (e.g.,
https://yourdomain.com:2087). - Enter your username and password to log in.
- Once logged in, you will see the WHM dashboard.
Step 2: Navigate to ‘Create a New Account’
After logging into WHM, find the “Create a New Account” option. This is where you’ll input all the necessary information to create the new cPanel account.

- In the WHM search bar, type “Create a New Account” or find it under the Account Functions section.
- Click on the Create a New Account option.
Step 3: Fill in the Account Information
The “Create a New Account” page is where you will provide the necessary details for the new account. This includes the domain, username, and password.
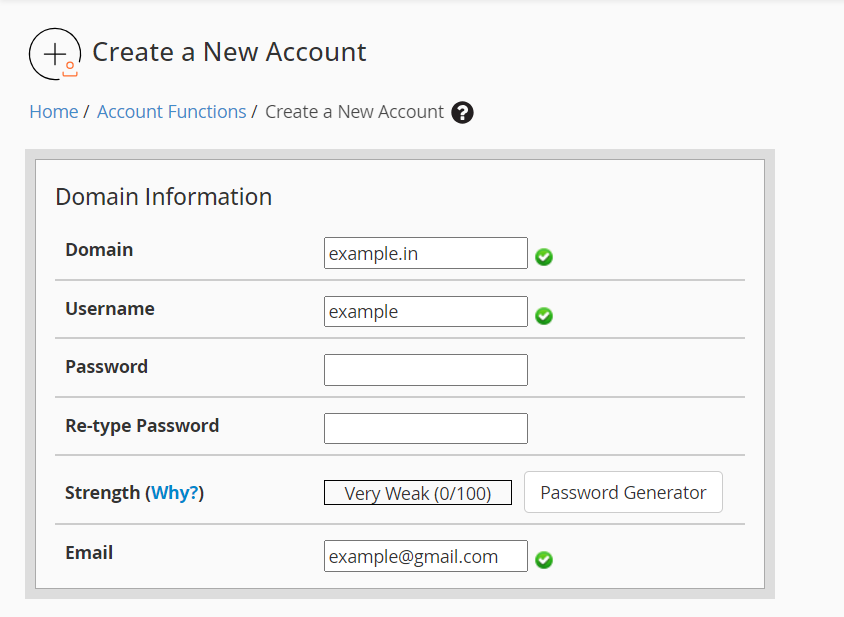
- Domain: Enter the domain name for the new account (e.g.,
example.com). - Username: WHM will automatically suggest a username based on the domain name, but you can modify it if necessary.
- Password: Create a strong password or use the password generator for enhanced security.
- Email: Enter the email address associated with this account for notifications and password resets.
Step 4: Choose a Package
In WHM, you can assign predefined resource limits through a package. If you haven’t created a package yet, you can manually set the account limits in this step.
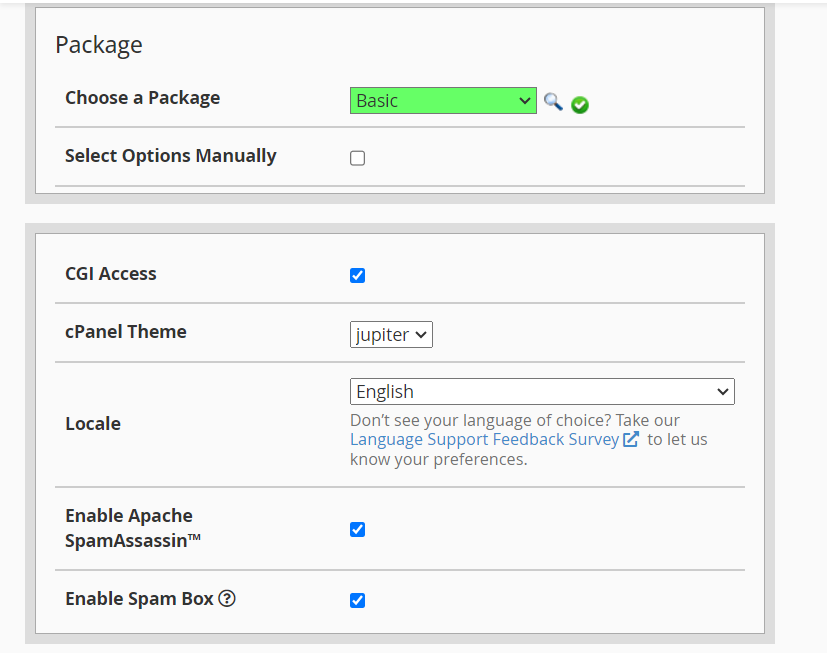
- Select a Package: If you have packages already set up, you can choose one from the dropdown menu. Packages define the resource allocation, such as disk space, bandwidth, and email accounts.
- Manual Resource Allocation: If you don’t have a package, you can manually set the resource limits for this account (e.g., disk space, bandwidth, number of FTP accounts).
Step 5: Configure Settings
Next, you’ll need to configure a few settings that control how the account behaves:
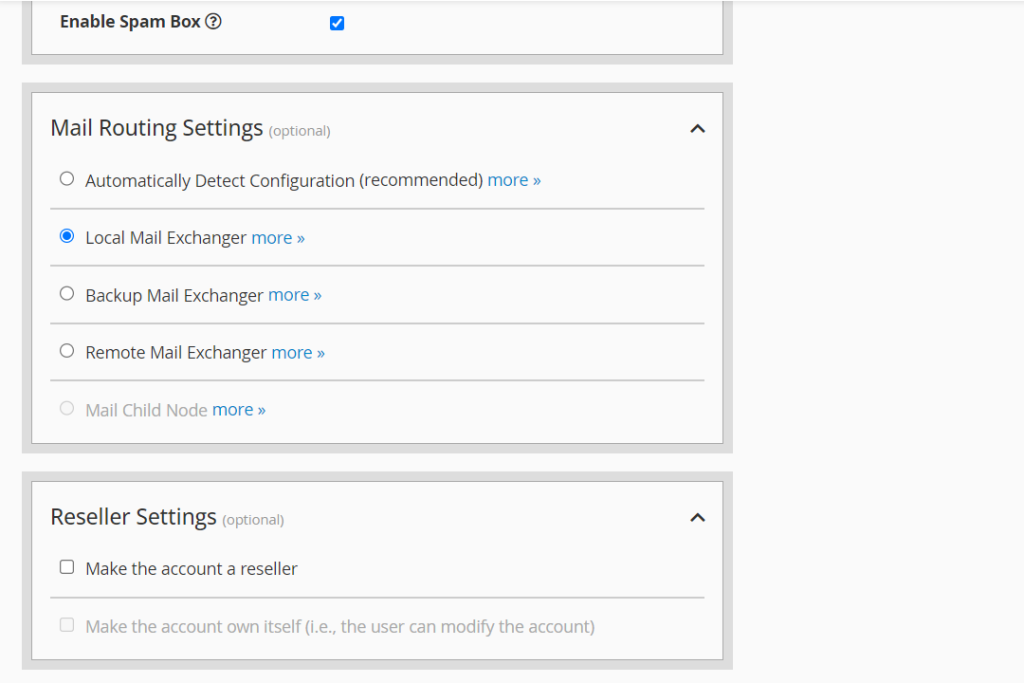
- DNS Settings: Choose whether you want WHM to automatically configure the DNS for the domain. For most users, the default setting is fine.
- Mail Routing Settings: Decide how the system will handle email for this domain. Options include Local Mail Exchanger (for local mail servers) and Remote Mail Exchanger (if using external mail servers like G Suite).
Step 6: Enable Features for the New Account
In this section, you can enable specific features that the account can access.
- CGI Access: This allows the account to run CGI scripts.
- Shell Access: Enable this option if the user requires SSH access to the server. This is generally not recommended unless the user needs it for advanced tasks.
- Dedicated IP: Choose whether this account should have a dedicated IP address or use the shared IP of the server.
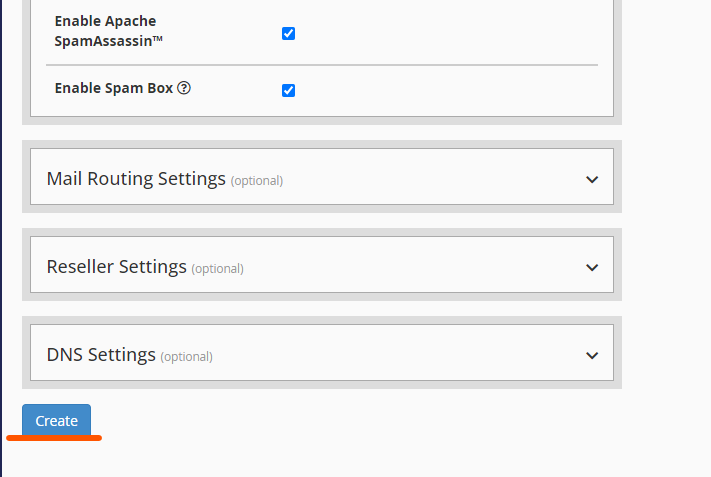
Step 7: Review and Create the Account
Before finalizing, review all the details you’ve entered to ensure accuracy.
- Double-check the domain, username, password, and resource limits.
- Once everything looks good, click the Create button at the bottom of the page.
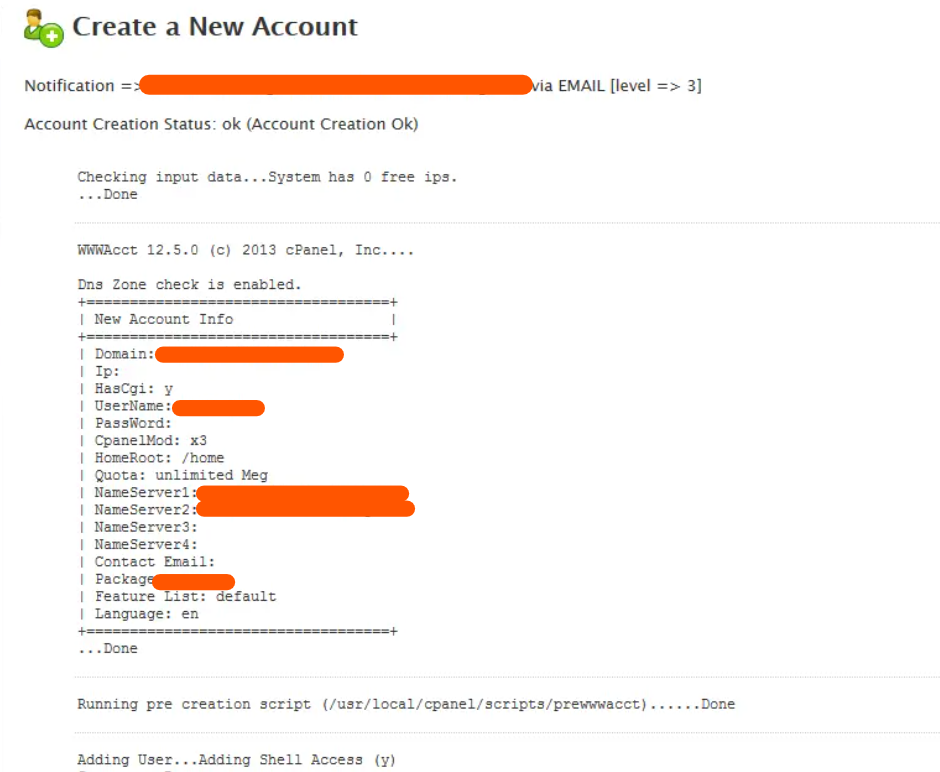
Step 8: Access the New cPanel Account
After creating the account, you can now access it through the cPanel interface:
- WHM Access: From the WHM dashboard, you can find the newly created account under List Accounts.
- Direct cPanel Login: You can also log in to the account by navigating to
https://yourdomain.com:2083and entering the username and password.

Troubleshooting Common Issues
- Invalid domain error: Ensure the domain is correctly formatted and doesn’t contain any typos.
- Password strength: If the password doesn’t meet the strength requirements, create a more secure password using a combination of letters, numbers, and special characters.
Conclusion
Creating a new account in cPanel is a straightforward process that gives users access to website and email management tools. With the help of WHM, you can easily create, customize, and manage multiple cPanel accounts on the same server, allowing for better organization and security. Whether you’re a reseller, hosting provider, or managing multiple websites, this process is essential for maintaining an efficient web hosting environment.
By following this guide, you now have a clear understanding of how to create a new account in cPanel using WHM. Make sure to allocate resources wisely and configure the settings appropriately to ensure optimal performance for each account.