

WebHost Manager (WHM) is an integral part of the cPanel suite, allowing server administrators and resellers to manage their hosting environments with ease. If you’re setting up WHM for the first time, it’s crucial to ensure everything is configured correctly to provide a smooth hosting experience for your clients. This blog post will guide you through the essential steps of a basic WHM setup in cPanel, covering everything from the initial configuration to creating and managing accounts.
Table of Contents
What is WebHost Manager (WHM)?
WebHost Manager (WHM) is a powerful administrative interface that grants you control over your web hosting server. With WHM, you can create and manage cPanel accounts, configure server settings, monitor server performance, and manage security configurations. It is an essential tool for web hosting resellers and system administrators alike.
Some of the core functionalities of WHM include:
- Creating and managing cPanel accounts
- Managing DNS zones
- Setting up email accounts and services
- Monitoring server health and performance
- Managing backups
- Customizing branding and themes for cPanel accounts
WHM is typically used by web hosting companies, resellers, and anyone who needs to manage multiple cPanel accounts on a single server. Let’s dive into the basic setup process.
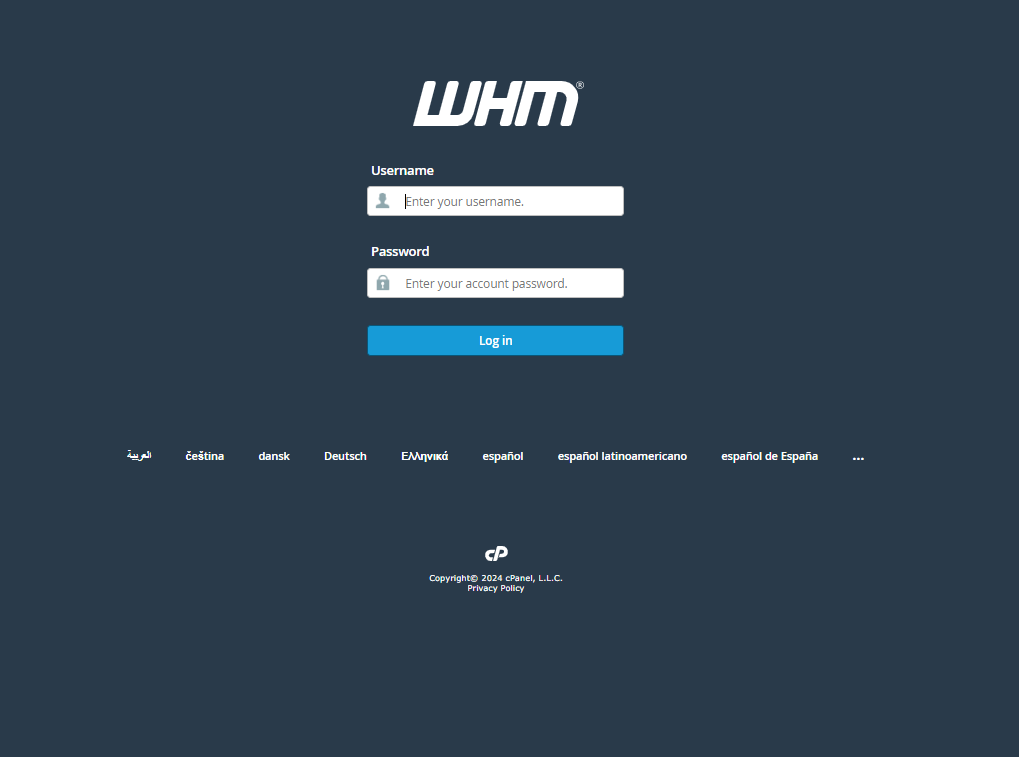
Accessing WebHost Manager (WHM)
The first step in setting up WHM is to access the interface. After you purchase a VPS or dedicated server with cPanel/WHM installed, your hosting provider will typically provide you with the login credentials.
To access WHM:
- Open your web browser and go to
https://your-server-ip:2087(replaceyour-server-ipwith your actual server’s IP address). - Log in using the root username and password provided by your hosting provider.
Once logged in, you’ll see the WHM dashboard, which serves as the control center for managing your server and cPanel accounts.
Basic WebHost Manager Setup
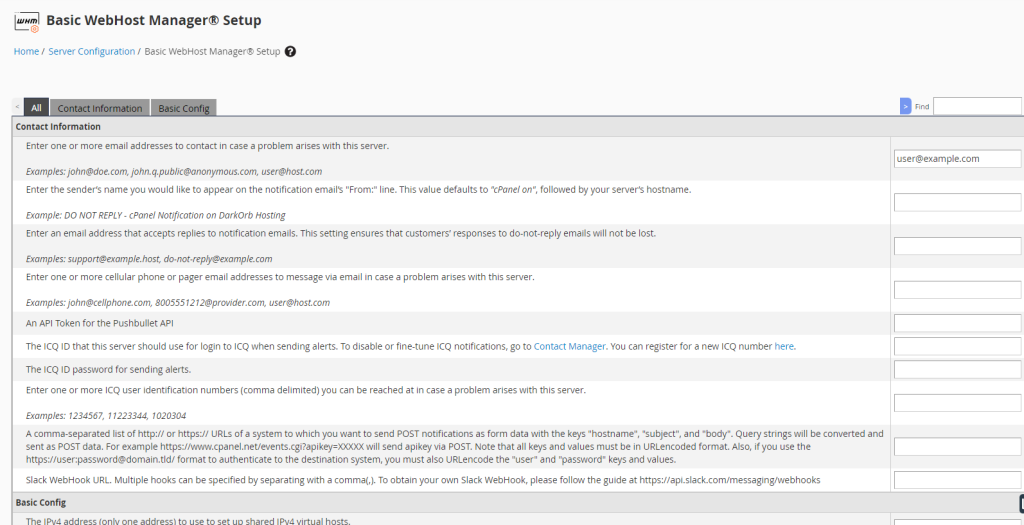
After logged in cPanel/WHM, the first thing you should do is go to the Basic WebHost Manager Setup menu. Here, you can configure some essential settings:

Contact Information: Enter your contact email address. You can also add your ICQ contact number, HipChat Room users, and Pushbullet API if you want to receive notifications.
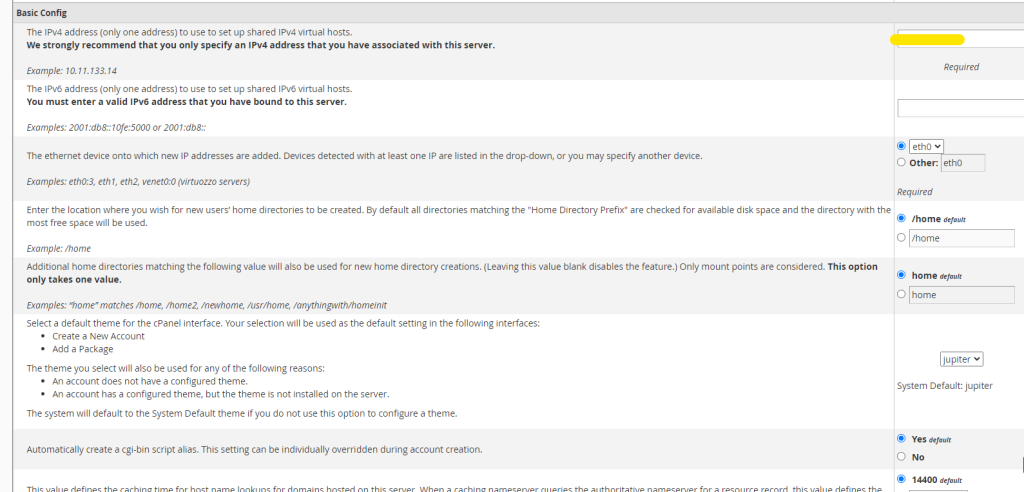
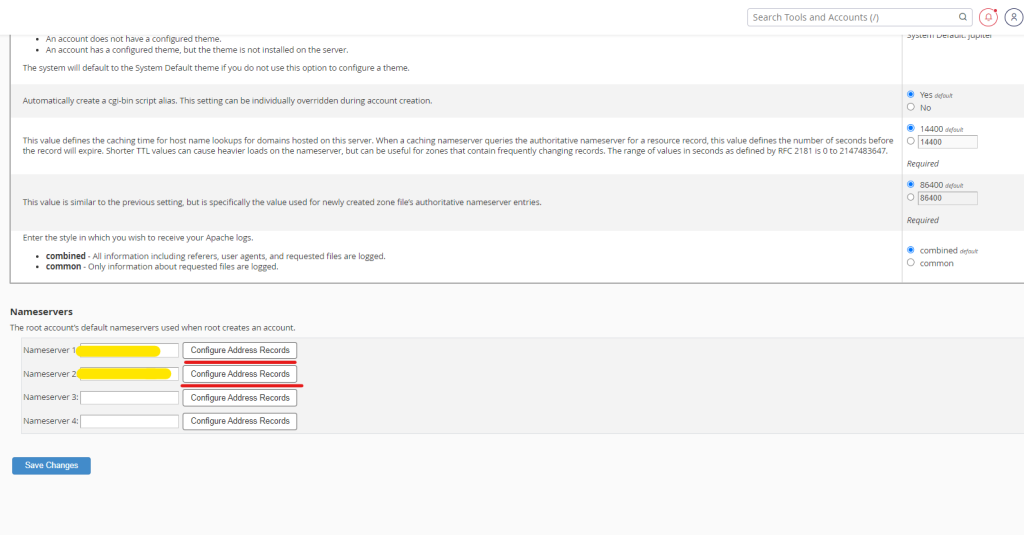
Server IP Address Options: Set up your shared IP addresses for both IPv4 and IPv6. You can also choose where new user home directories will be created, select the default cPanel interface, and decide if you want to automatically create a cgi-bin script alias for users. You can also set the style for Apache logs (combined or common).
Default Nameservers: Choose the nameservers you want to use and enter their IP addresses. You can configure up to four nameservers from this interface.
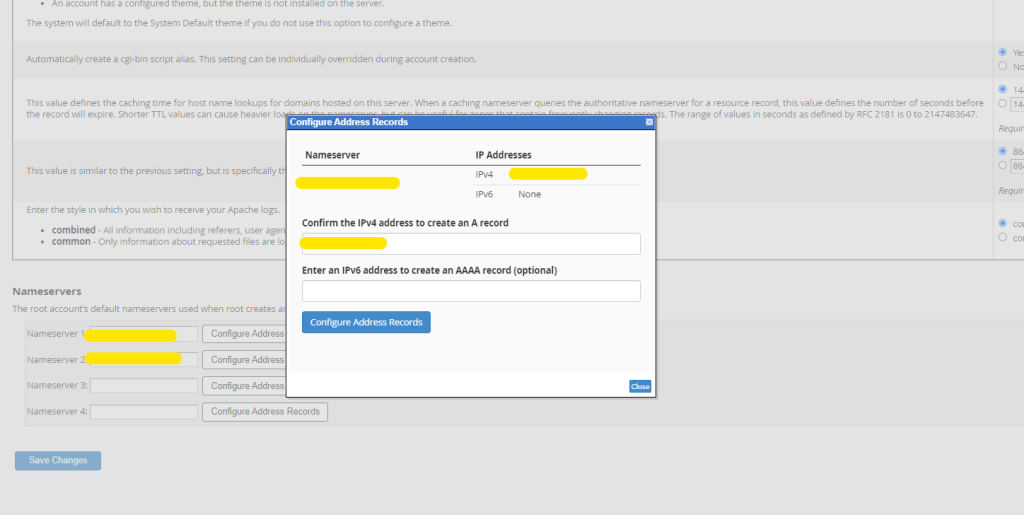
This setup will ensure that your cPanel/WHM environment is ready for hosting websites.
Conclusion
Setting up WebHost Manager® (WHM) is an essential step for anyone managing a cPanel server, whether you’re a web hosting provider, reseller, or system administrator. The initial configuration lays the foundation for a stable and secure hosting environment. By setting up your contact information, configuring IP addresses, selecting default nameservers, and defining key server settings, you ensure that your server is ready to handle web hosting tasks efficiently.
A well-configured WHM allows you to manage your server and cPanel accounts with ease, offering flexibility in resource allocation, account management, and security settings. Whether you’re creating hosting packages, managing DNS, or setting up backups, WHM provides the tools necessary to streamline your hosting operations.
After completing the basic setup, you’re well on your way to offering reliable hosting services. Remember to regularly monitor your server, update software, and maintain backups to keep your hosting environment secure and running smoothly. With WHM, managing multiple cPanel accounts on a single server becomes a straightforward and efficient process, ensuring a positive experience for both administrators and users.