
Backups are an essential part of managing any website or server. They provide a safeguard against data loss, corruption, or cyberattacks. In the event of an issue, having a proper backup in place allows you to restore your website or data to its previous state quickly. cPanel, one of the most popular web hosting control panels, offers a built-in backup configuration feature that simplifies the process of creating and managing backups. This guide will walk you through configuring the backup settings in cPanel.
Table of Contents
Why Backup Configuration Matters
Backup configuration in cPanel is crucial for website owners and administrators for several reasons:
- Data Protection: Regular backups ensure that your data is safe from accidental deletion, hardware failure, or malicious attacks.
- Quick Recovery: If your website goes down due to an issue, a backup allows you to restore it quickly, minimizing downtime.
- Peace of Mind: Knowing that your data is backed up regularly provides reassurance that you won’t lose critical information.
- Compliance: For businesses handling sensitive information, regular backups are often required to meet compliance standards.
Now that we understand the importance of backups, let’s dive into the steps required to configure backup settings in cPanel.
Access the Backup Configuration in cPanel
To configure the backup settings, you need to log in to your cPanel account. Here’s how to access the backup configuration:
- Log in to cPanel: Enter your cPanel username and password to log in.
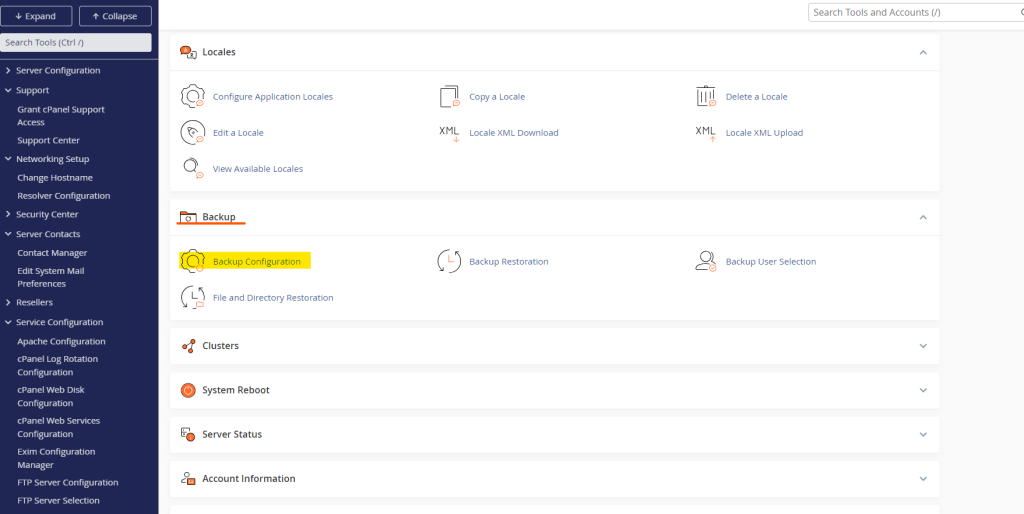
- Locate the Backup Configuration Tool: In the cPanel dashboard, scroll down to the “Files” section and click on the “Backup” icon. Alternatively, you can use the search bar at the top of the dashboard to search for “Backup” and select it from the results.
Enable the Backup System
Once inside the Backup section, the first step is to enable the backup system. By default, the backup system may be disabled, so you need to turn it on:
- Click on “Backup Configuration”: This option will take you to the backup configuration settings.
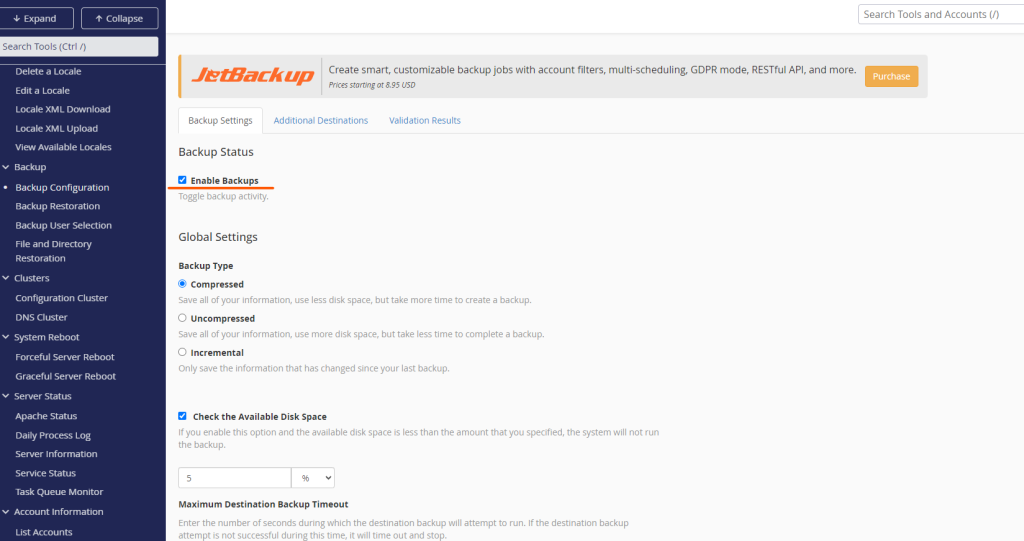
- Enable Backups: At the top of the Backup Configuration page, you will see an option labeled “Backup Status.” Toggle this setting to “Enabled” to turn on backups.
Configure Backup Type and Schedule
After enabling backups, the next step is to configure the type of backup and the backup schedule. cPanel offers various options that allow you to customize the backup process according to your needs.
Full Backup vs. Partial Backup
- Full Backup: A full backup includes all of the files, databases, emails, and settings associated with your cPanel account. It is ideal for creating a complete snapshot of your account.
- Partial Backup: A partial backup allows you to back up specific elements of your account, such as only files, databases, or emails. This option is useful if you want to save storage space or focus on backing up critical components.
To configure your backup type:
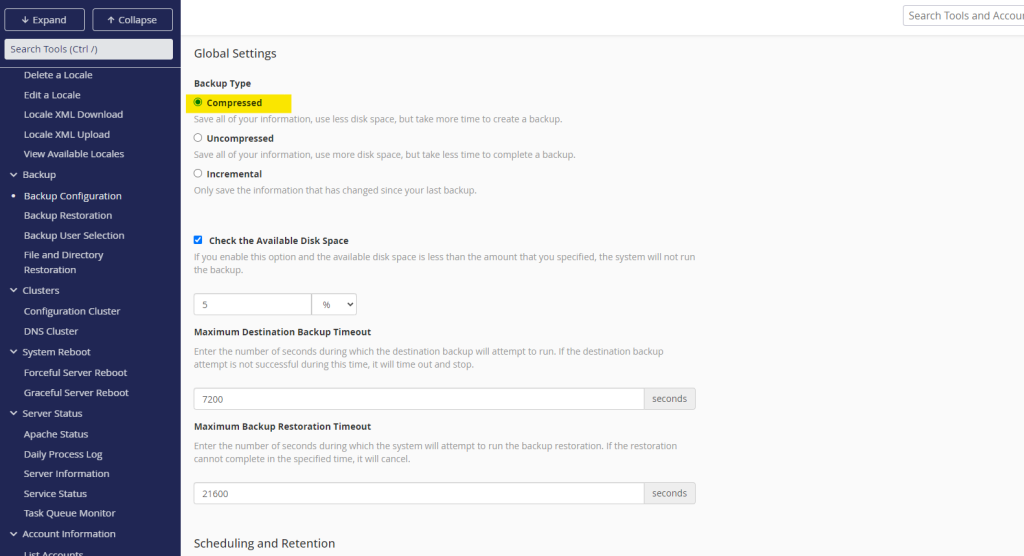
- Select Backup Type: Choose between “Compressed” (recommended for saving space), “Uncompressed” (faster but requires more storage), or “Incremental” (backs up only changes since the last backup).
- Decide on Full or Partial Backup: Depending on your needs, select whether to perform full or partial backups.
Setting a Backup Schedule
Scheduling backups is crucial for automating the backup process. cPanel allows you to schedule backups on a daily, weekly, or monthly basis:
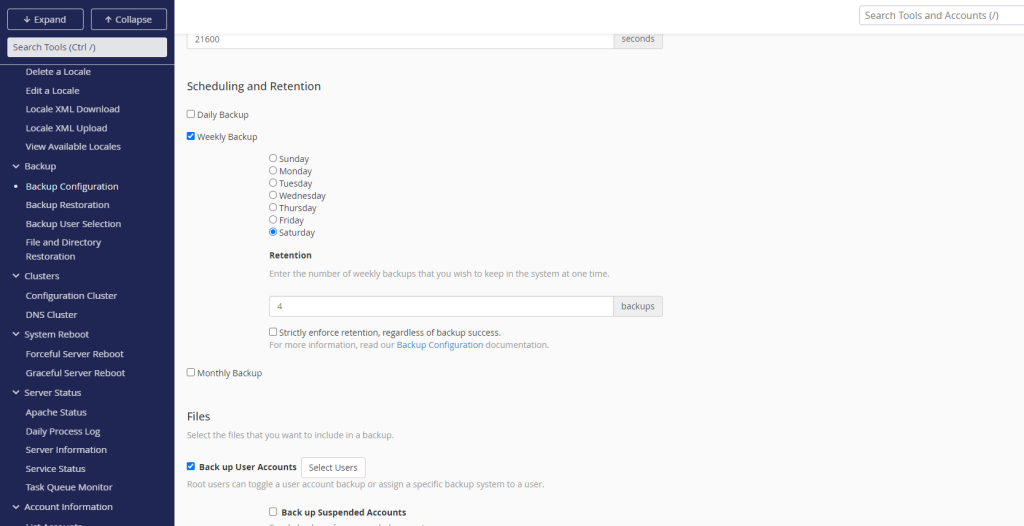
- Daily Backups: Ideal for frequently updated websites. You can set the backup to run every day or on specific days of the week.
- Weekly Backups: Suitable for websites that don’t change frequently. You can schedule a weekly backup on a specific day of the week.
- Monthly Backups: Best for websites with minimal changes. You can schedule a monthly backup on a specific date.
To configure the backup schedule:
- Choose Backup Frequency: Select the backup frequency (daily, weekly, or monthly) based on your requirements.
- Select Backup Retention: Specify how many backup copies you want to retain. For example, if you choose to keep three backups, the oldest backup will be deleted when a new one is created.
Choose Backup Destinations
cPanel allows you to store backups in various locations. Depending on your needs, you can choose one or multiple backup destinations. Here are the common options:
Local Backup
The most straightforward option is to store backups on the same server where your cPanel account is hosted. This option is convenient but can consume server storage space quickly, especially if you retain multiple backups.
- Enable Local Backup: Check the box to enable local backups. This will store backups in a directory on your server.
- Consider Disk Space: Monitor your disk usage to ensure that local backups do not consume all available storage.
Save Your Backup Configuration
After configuring your backup settings, it is essential to save your configuration to ensure that the backups are performed according to your specifications:
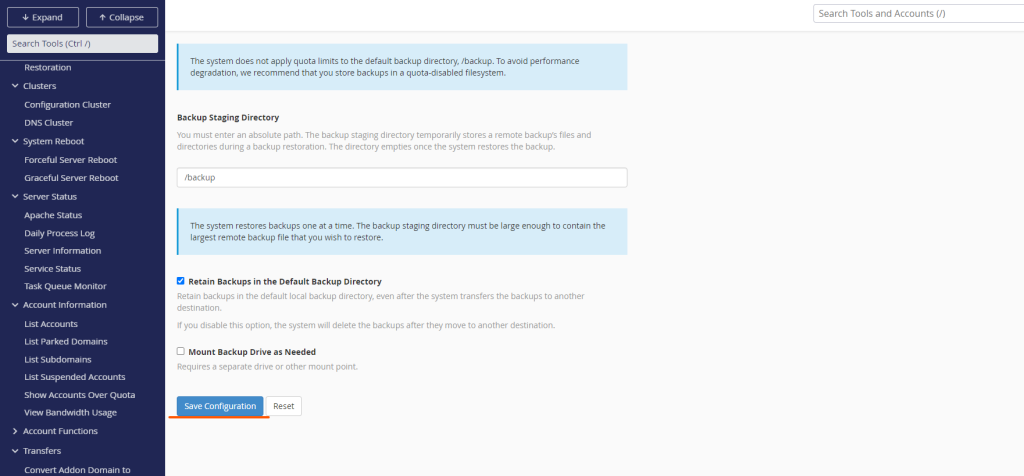
- Click the “Save Configuration” Button: Once you’ve configured all your backup settings, scroll to the bottom of the page and click the “Save Configuration” button.
- Verify Backup Configuration: After saving your configuration, cPanel will begin performing backups according to the schedule and settings you specified. You can verify that your backups are running by checking the “Backup Restoration” section in cPanel.
Best Practices for Backup Configuration in cPanel
While configuring backups in cPanel is relatively straightforward, there are a few best practices to keep in mind:
- Test Your Backups: Periodically test your backups by restoring them in a staging environment to ensure that they work as expected.
- Monitor Disk Usage: Regularly check your disk space usage to ensure that backups do not consume excessive storage.
- Use Multiple Backup Locations: Store backups both locally and remotely to provide an additional layer of protection.
- Automate Backups: Set up automated backups to ensure that your data is regularly backed up without manual intervention.
Conclusion
Configuring backup settings in cPanel is a crucial step in safeguarding your website and data. By following the steps outlined in this guide, you can set up an effective backup system that meets your needs. Remember, backups are your safety net—without them, recovering from data loss can be a challenging and time-consuming process.
Take the time to configure your backups today and rest easy knowing that your data is protected.